When searching for a new note taking app, one may be easily overwhelmed. There are countless options out there and they all seemingly have similar features. Some big players in the note-taking community include:
I personally ended up choosing an app called Obsidian. So far, it has been great. It has all the features that I believe to be non-negotiable-- Graph view, inter-note linking, cross platform, and offline syncing. The one major flaw with Obsidian is that in order to use syncing features, you must pay $8 per month to use their service. That is good and all, but I've found a way to do it for free, that also supports E2E encryption. Let me show you how I did it.
Set up AWS account (free tier)
In order to actually be "free", we will be using an AWS free tier account. You could also use other cloud providers like oracle azure, but AWS is my choice.
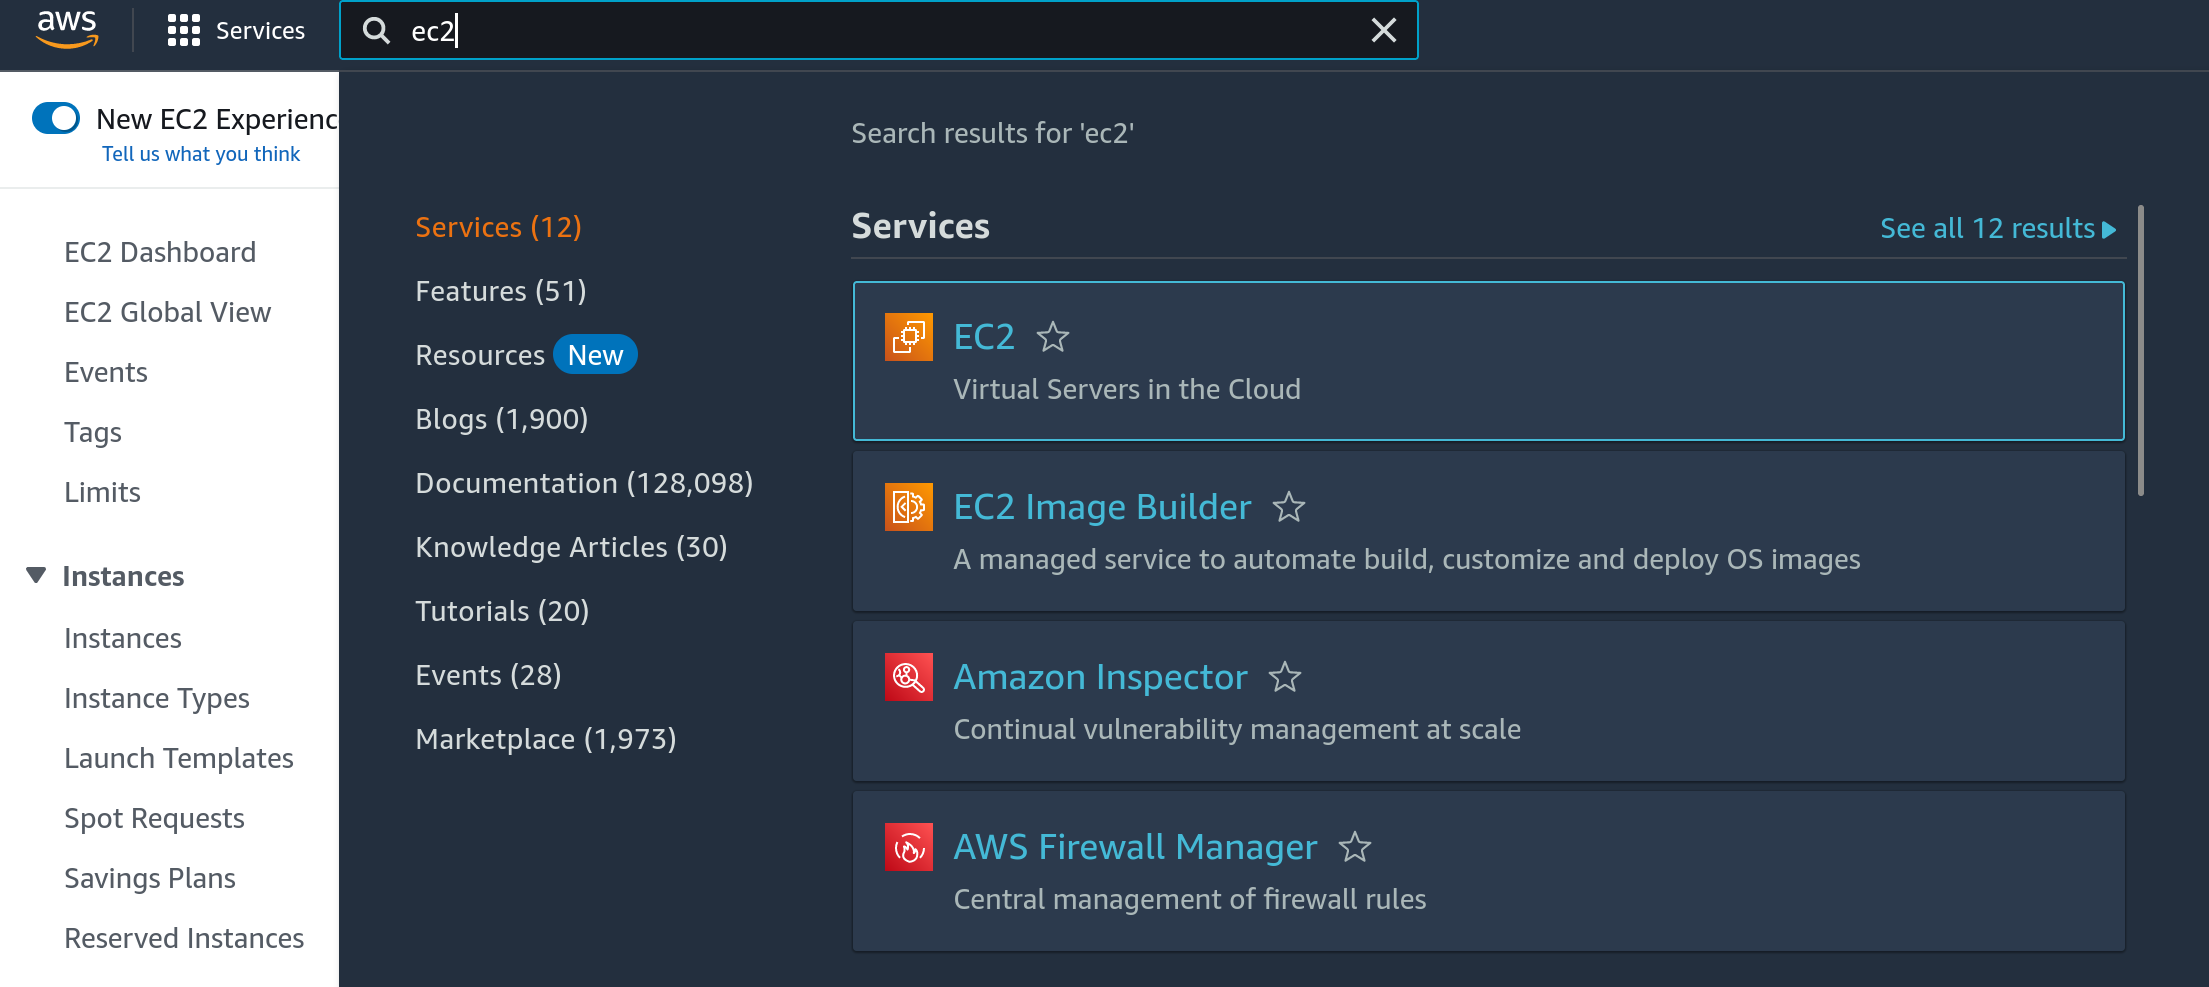
After you've created your account, go to the search bar at the top of the page and search for EC2, and click on it.
Next, select instances on the left and click the big orange Launch Instance button on the top right. Keep all of the settings as default and then (if you don't already have one), create an SSH keypair. This will download a file ending with .pem. Keep this safe and do not share it. It's how you'll access your server from now on.
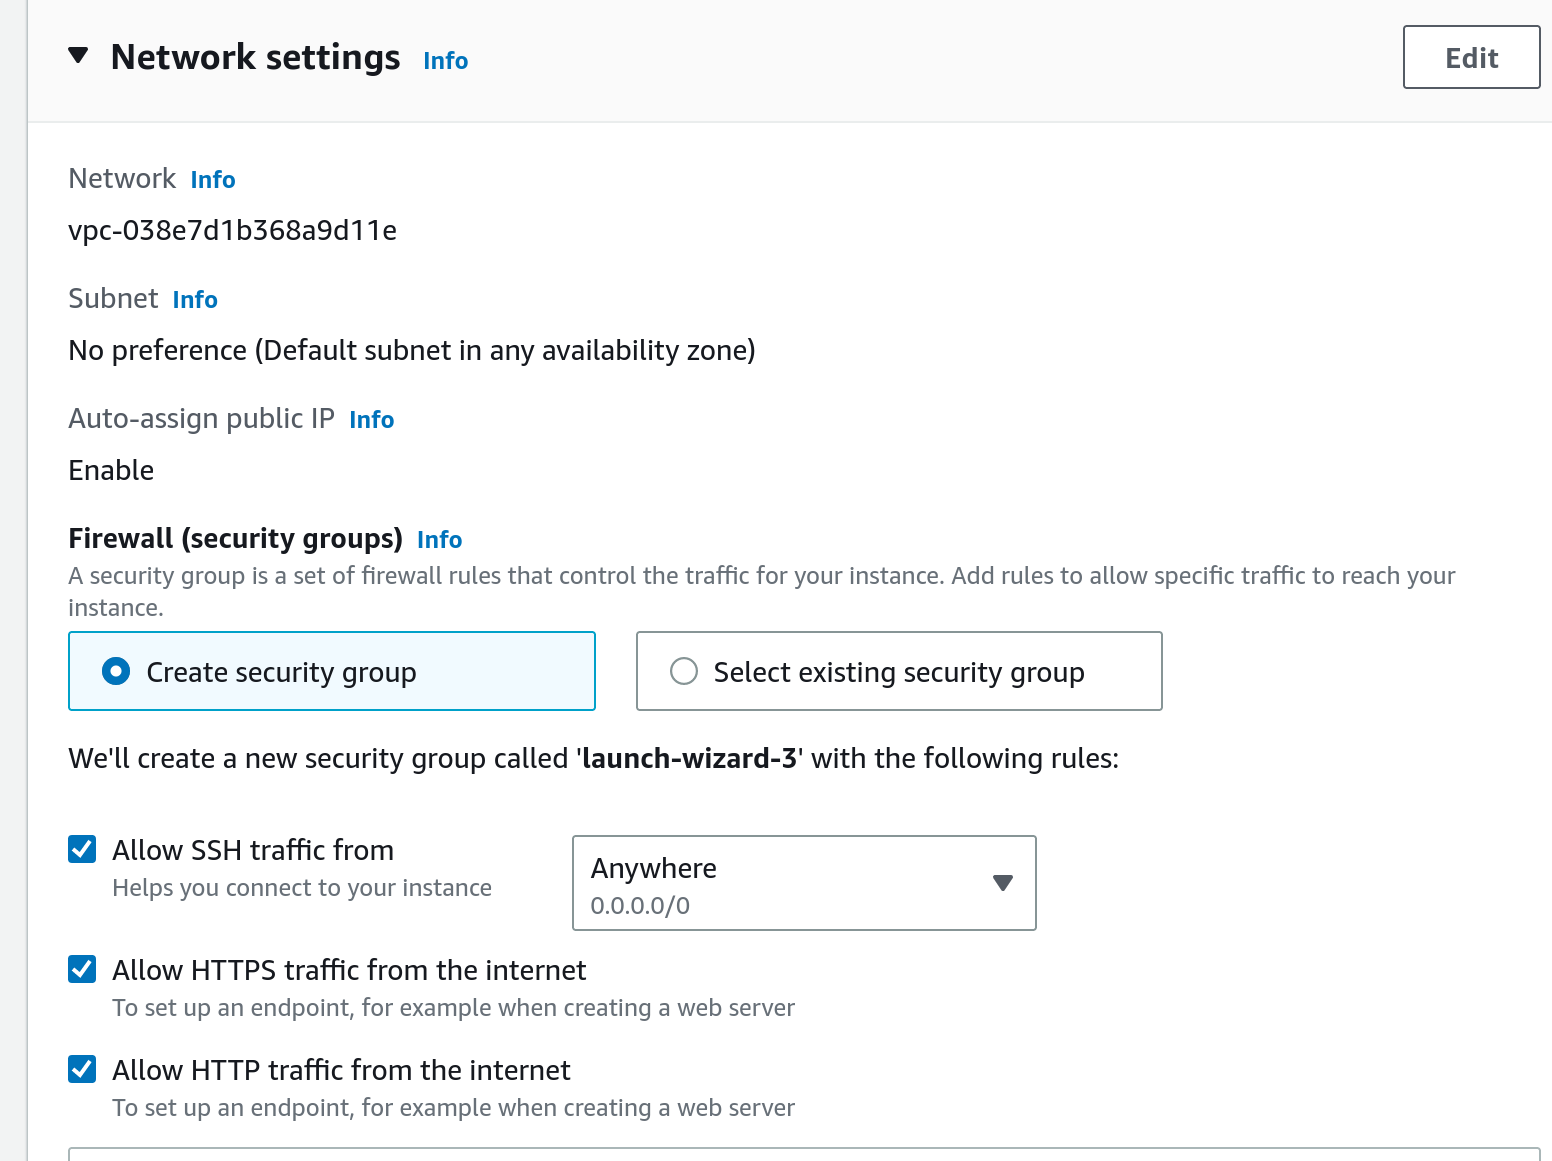
Next, under network settings, make sure you press both Allow HTTP traffic from internet and Allow HTTPS traffic from internet. Otherwise, your server will not be reachable.
The last parameter to configure is storage. AWS free tier allows for 20gb of storage, so I recommend setting your storage to the max (20gb). Finish the creation and submit your configs, and you will be redirected to the ec2 dashboard. You should now see your new ec2 instance:

Click the Instance ID and copy the public IP highlighted below:
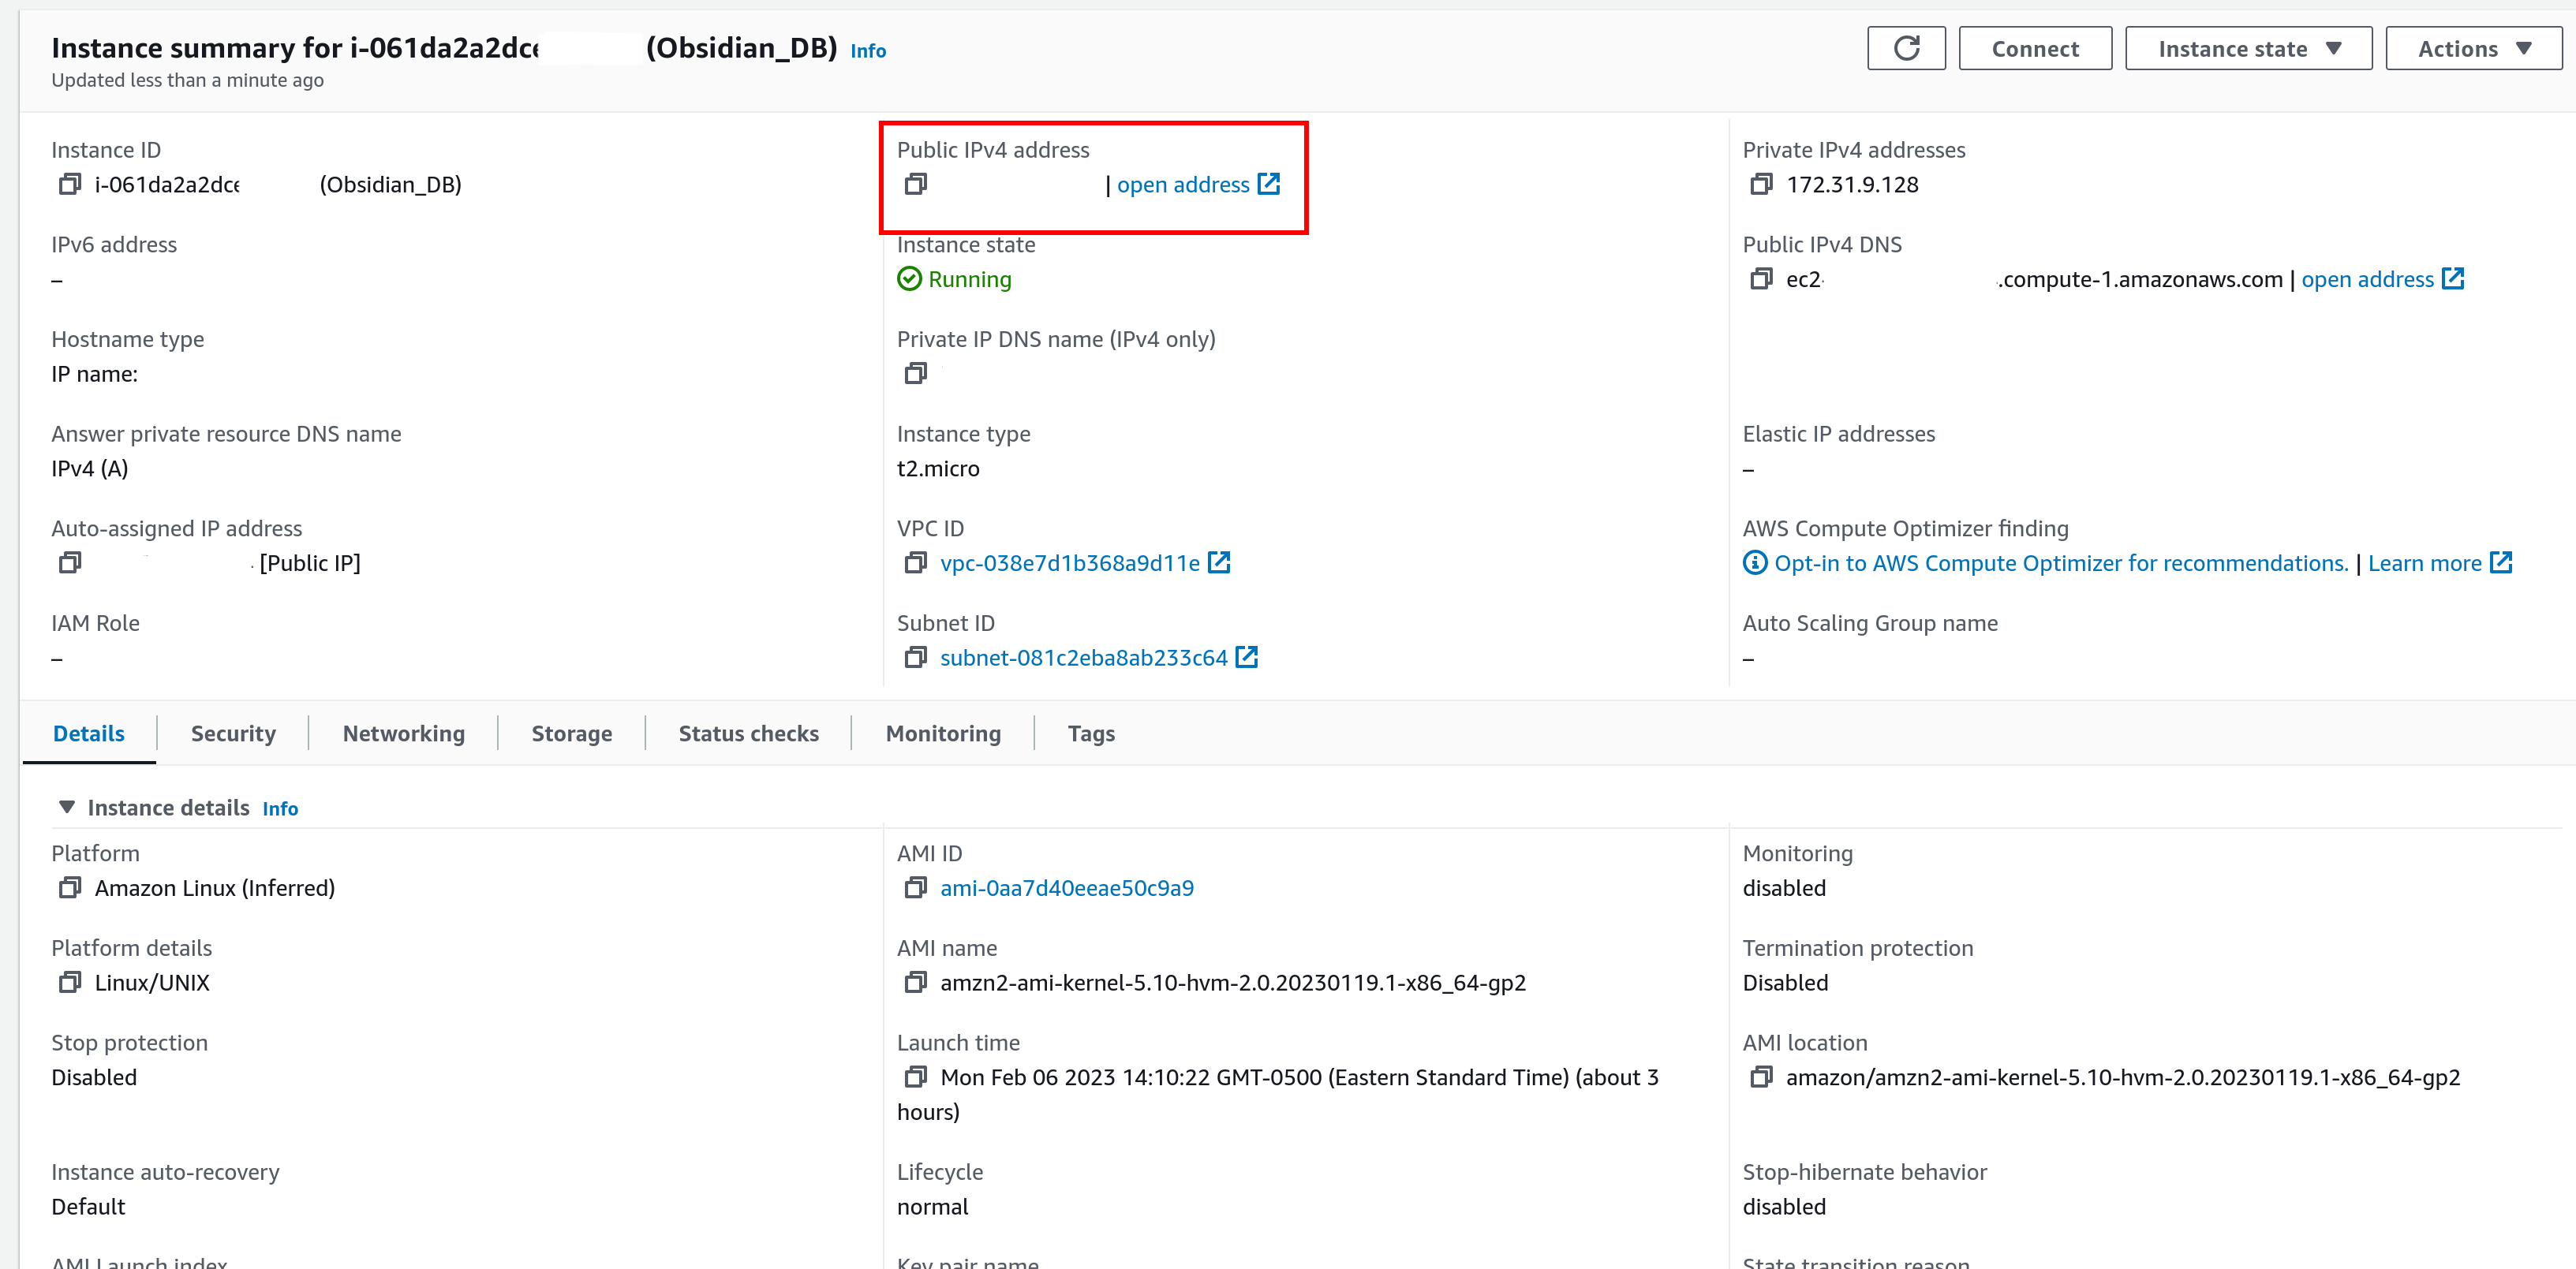
This is the IP we will use to connect. Now open up a terminal and navigate to where you downloaded your .pem file. Change the file permissions with chmod 400 <file>.pem, then connect to your instance with ssh -i <file>.pem ec2-user@<ip>, where <ip> is the public IP you copied in the last step.
Setting up the VM
Now that we have access to our machine, we need to install some dependencies:
yum install git -y && amazon-linux-extras install docker
Then, enable docker as a service:
systemctl start docker && systemctl enable docker
Next, clone this repo that holds a docker-compose file that will set up a reverse proxy and CouchDB container:
git clone https://github.com/vrtmrz/self-hosted-livesync-server.git
Go into that directory and edit the docker-ccompose.yml. Change the caddy_handle_path_1 from /e=_/* to something like /randomword/*.
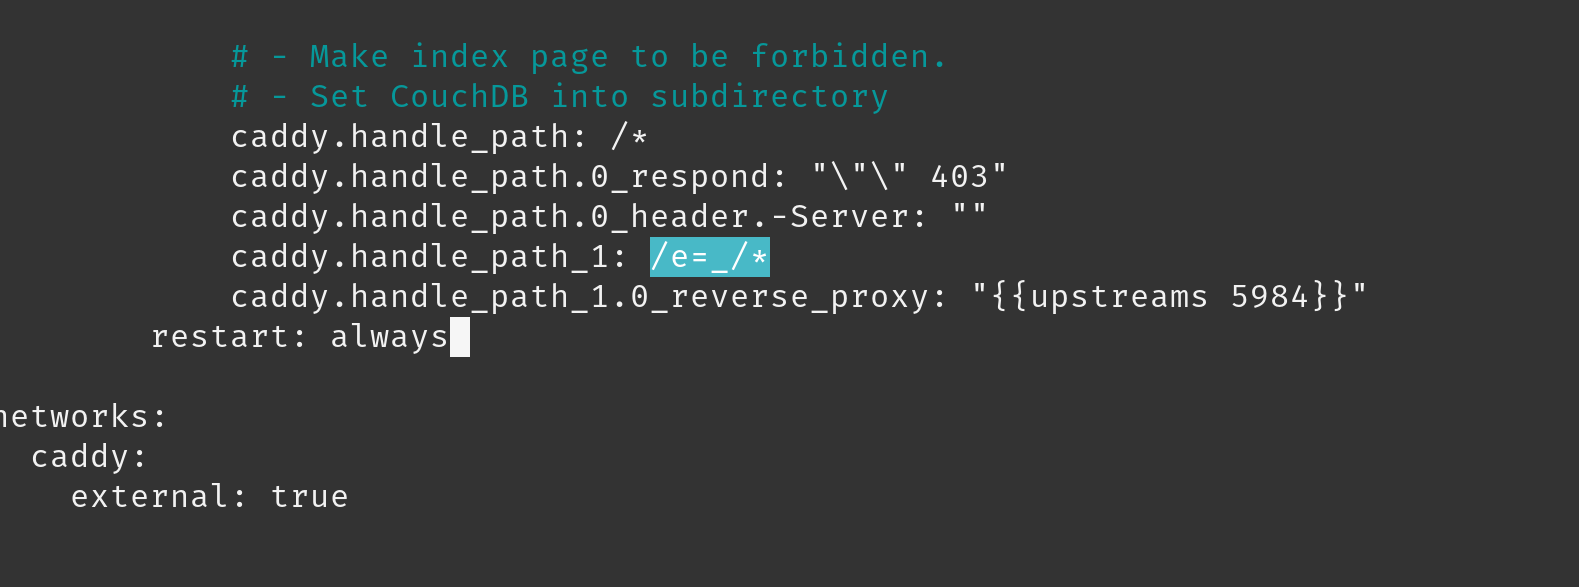
Then go into conf/local.ini and change authentication_redirect: in a likewise fashion, using the same word you chose for the first change.
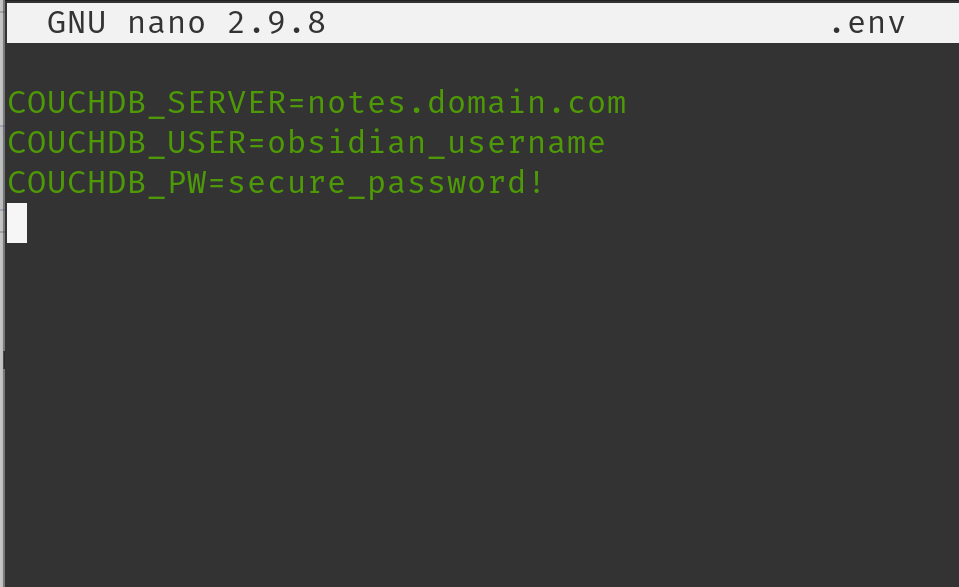
Go back to the project root dir and create a .env file, and create a few environment variables:
Handle DNS requests
Now that the image is built, we need to give it a nice domain name. This tutorial is assuming you already own a domain. I use CloudFlare to manage my DNS, but this will work with whatever DNS provider you use. If you aren't sure, check with the registrar where you purchased the domain. You're going to want to add an A record on the same subdomain that you wrote in the .env file, and you'll want it to point to your EC2 instance public IP from the previous steps.
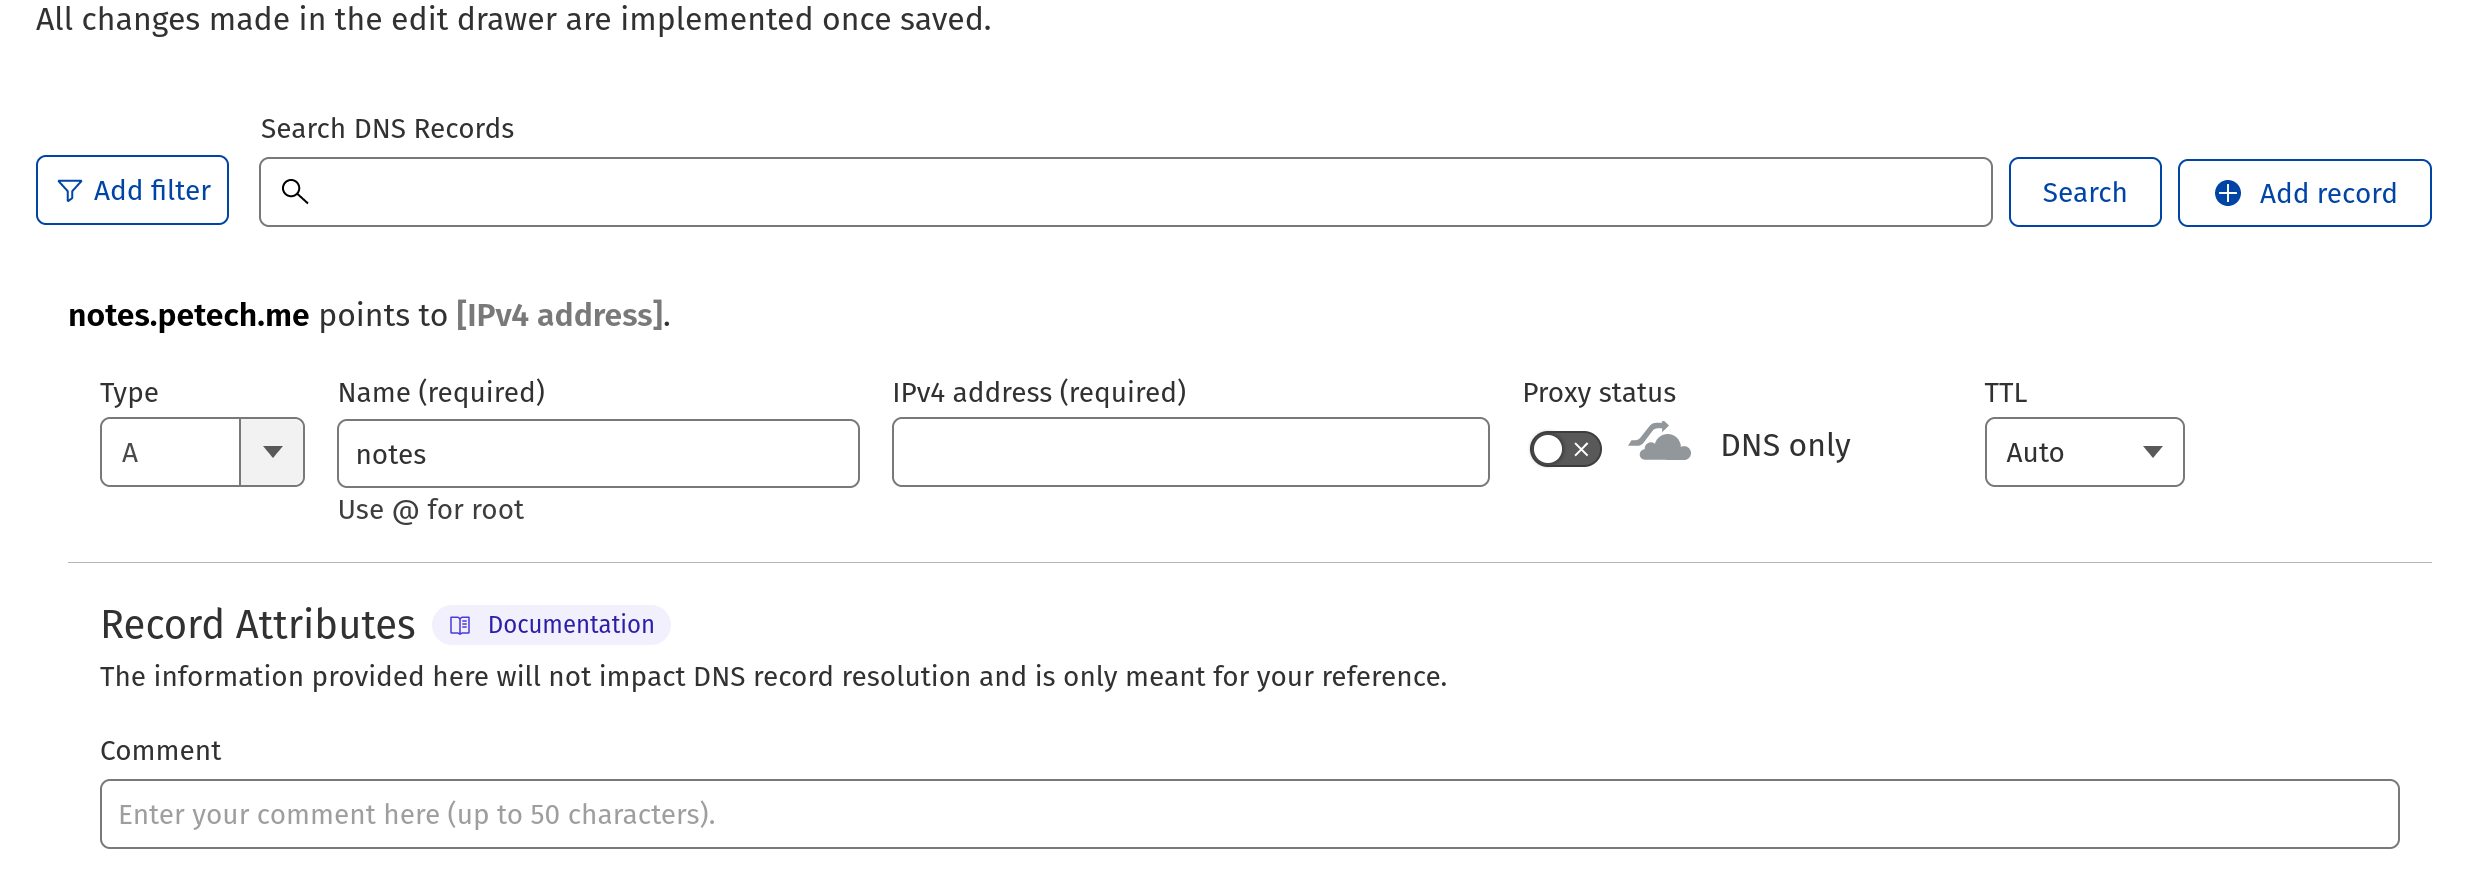 If using CloudFlare, make sure you deselect the proxy option
Building and configuring
Everything is built now. Connect to your EC2 instance again with SSH and enter the project root directory we were working in previously. Start the service with:
docker-compose -f docker-compose.yml start
Your service is now up, and the only thing left to do is go to your CouchDB instance. In a browser, navigate to https://<randomword> was the word you chose in place of e=_ and <domain> is the same as you specified in the .env file. Log in using the credentials in your .env file and you should be greeted with a screen that looks like this:
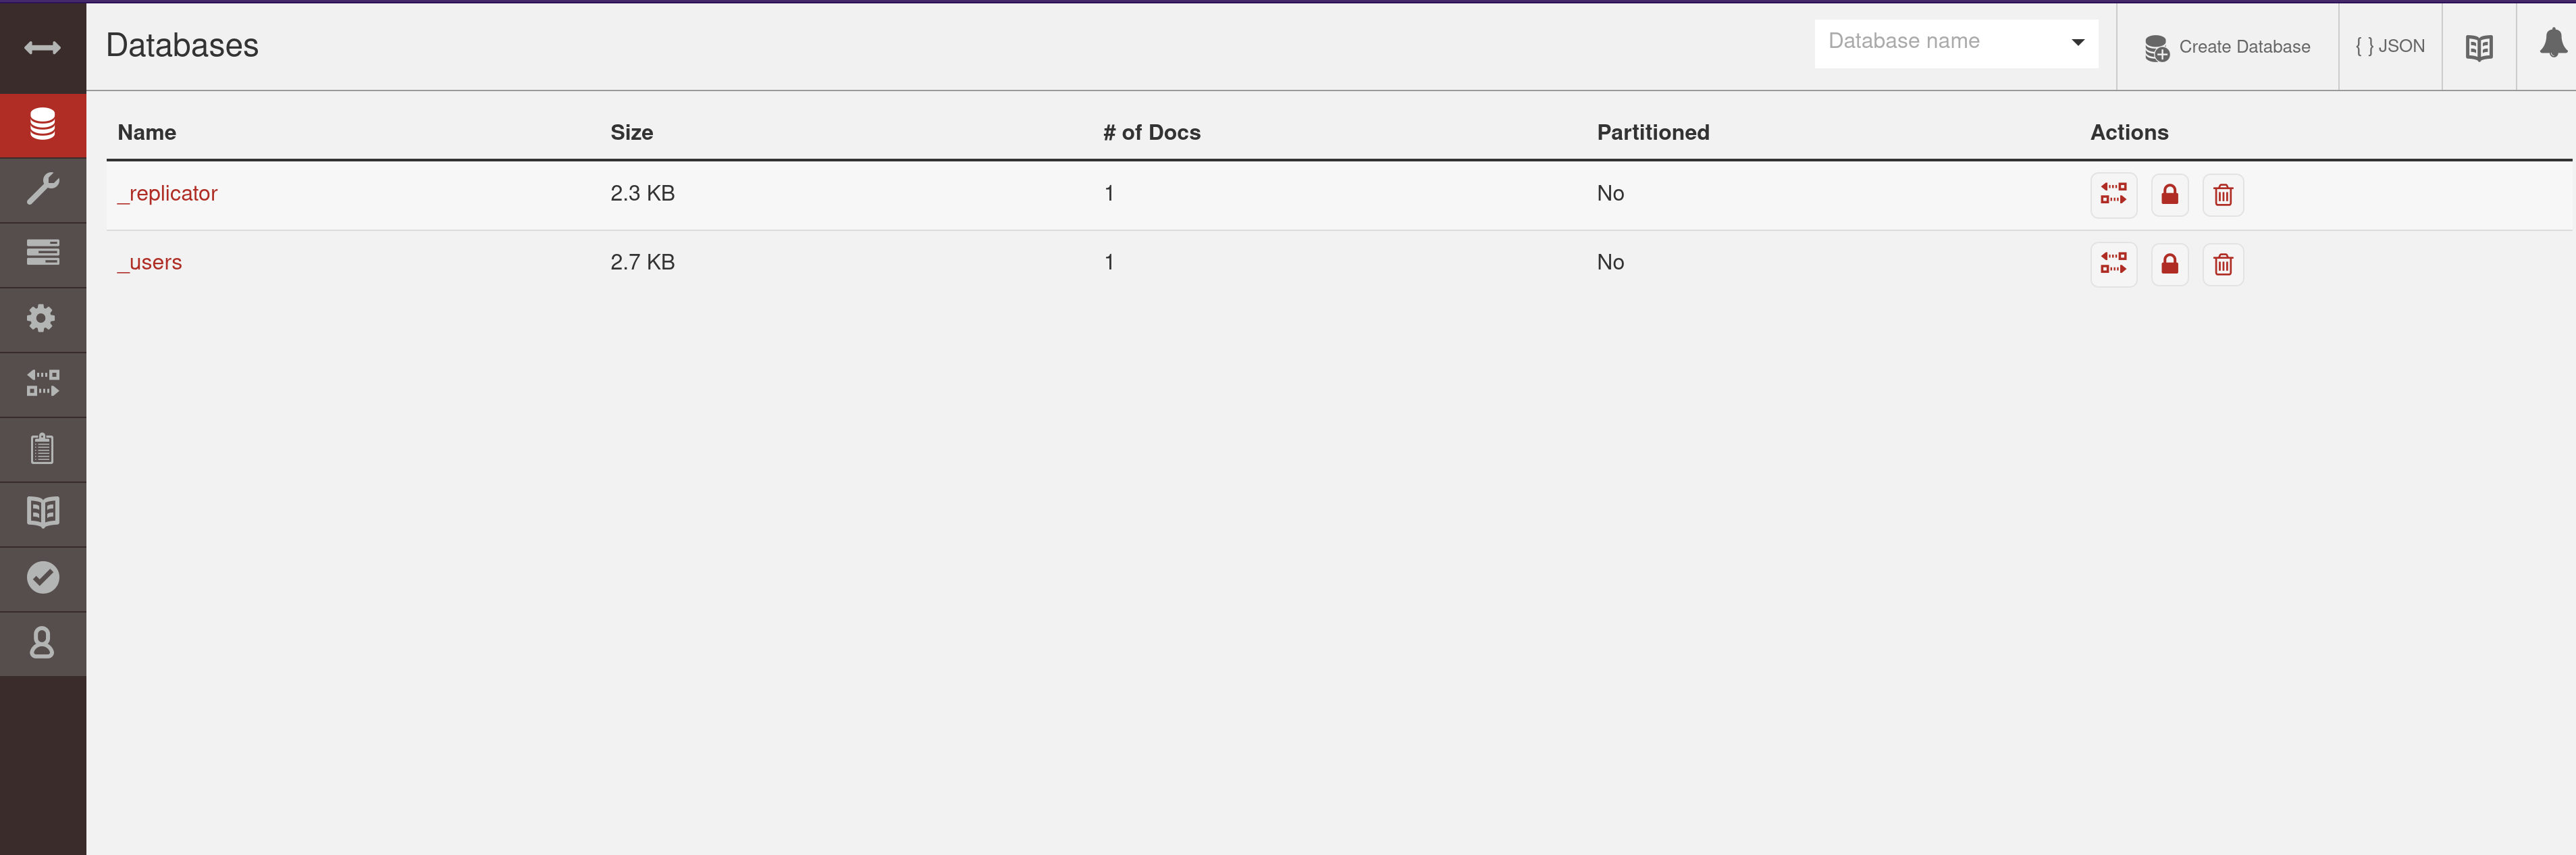
At the top of the screen, select Create Database and name it whatever you want. Select a non-partitioned DB.
Using it with Obsidian
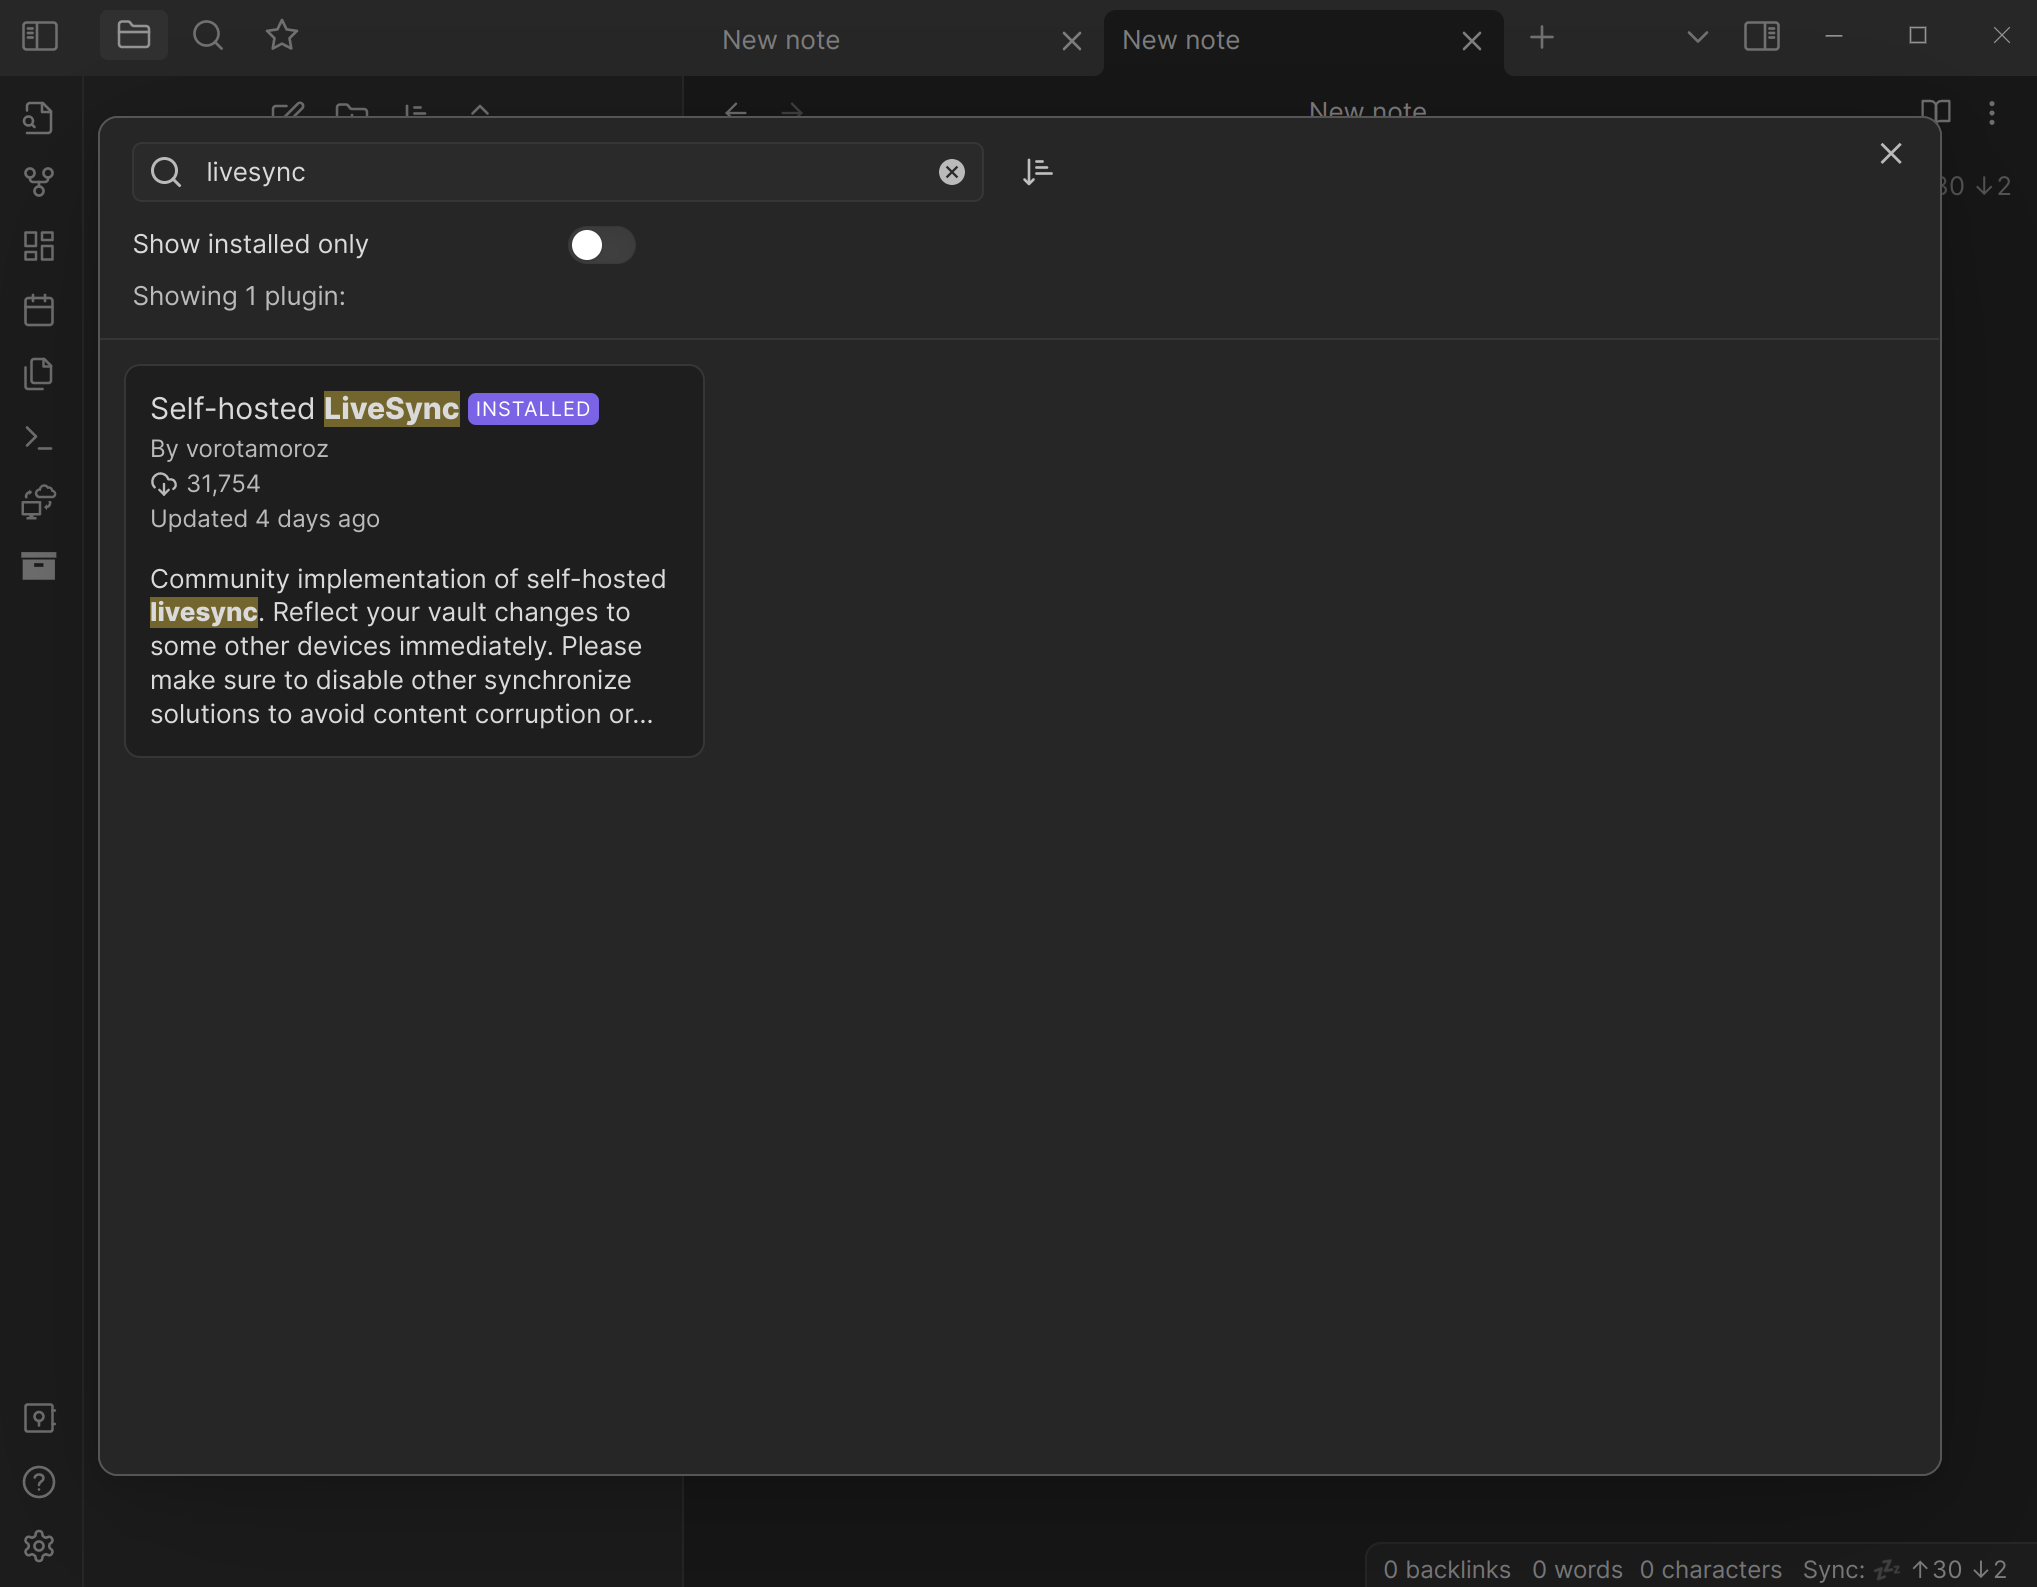
Now everything is set up. You just need to point your Obsidian to it. In obsidian, download the Self-Hosted LiveSync community plugin: Settings>Community Plugins>Browse
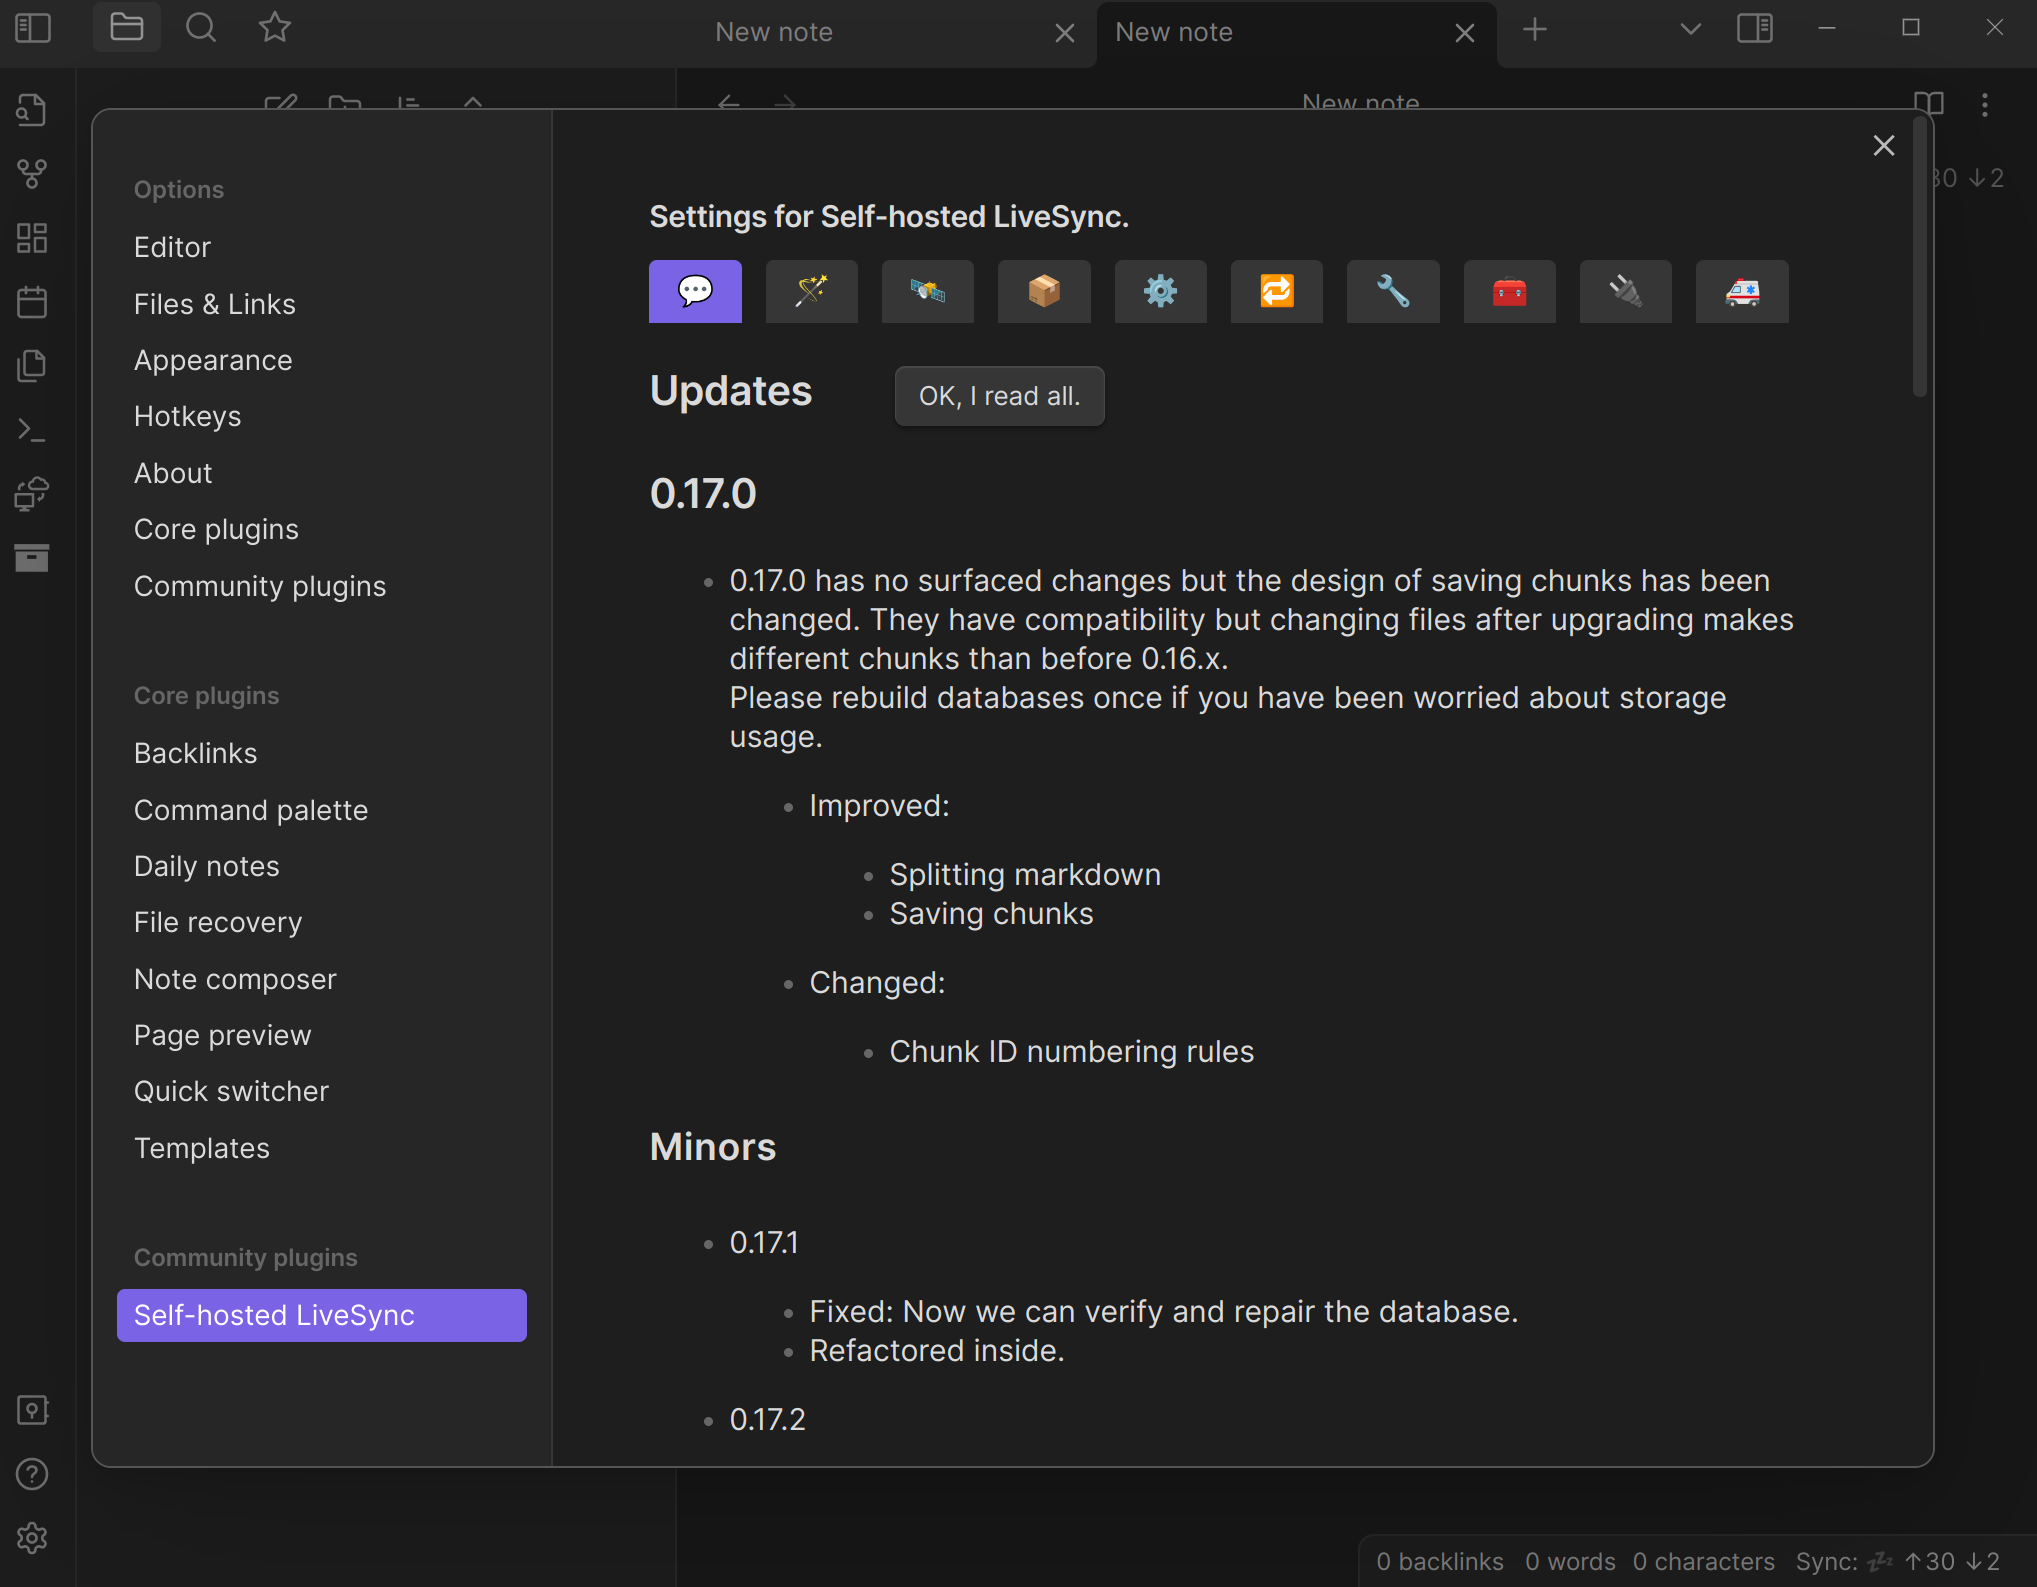
Install and enable it, then on your settings page you should see an extra tab on the left at the bottom. Go there:
Press the satellite emoji and fill out the fields with your information. For URI, you'll want to put in https://<yourdomain>.com/<randomword> Note that there is not a slash at the end. For username and password, put what you wrote in the .env file. Database Name is the database you created on the CouchDB instance.
For E2E encryption, select the End to End Encryption slider and create a passphrase. This will create a master password that you can use to encrypt your notes. Apply your settings and press the big red Send button near the bottom of the panel.
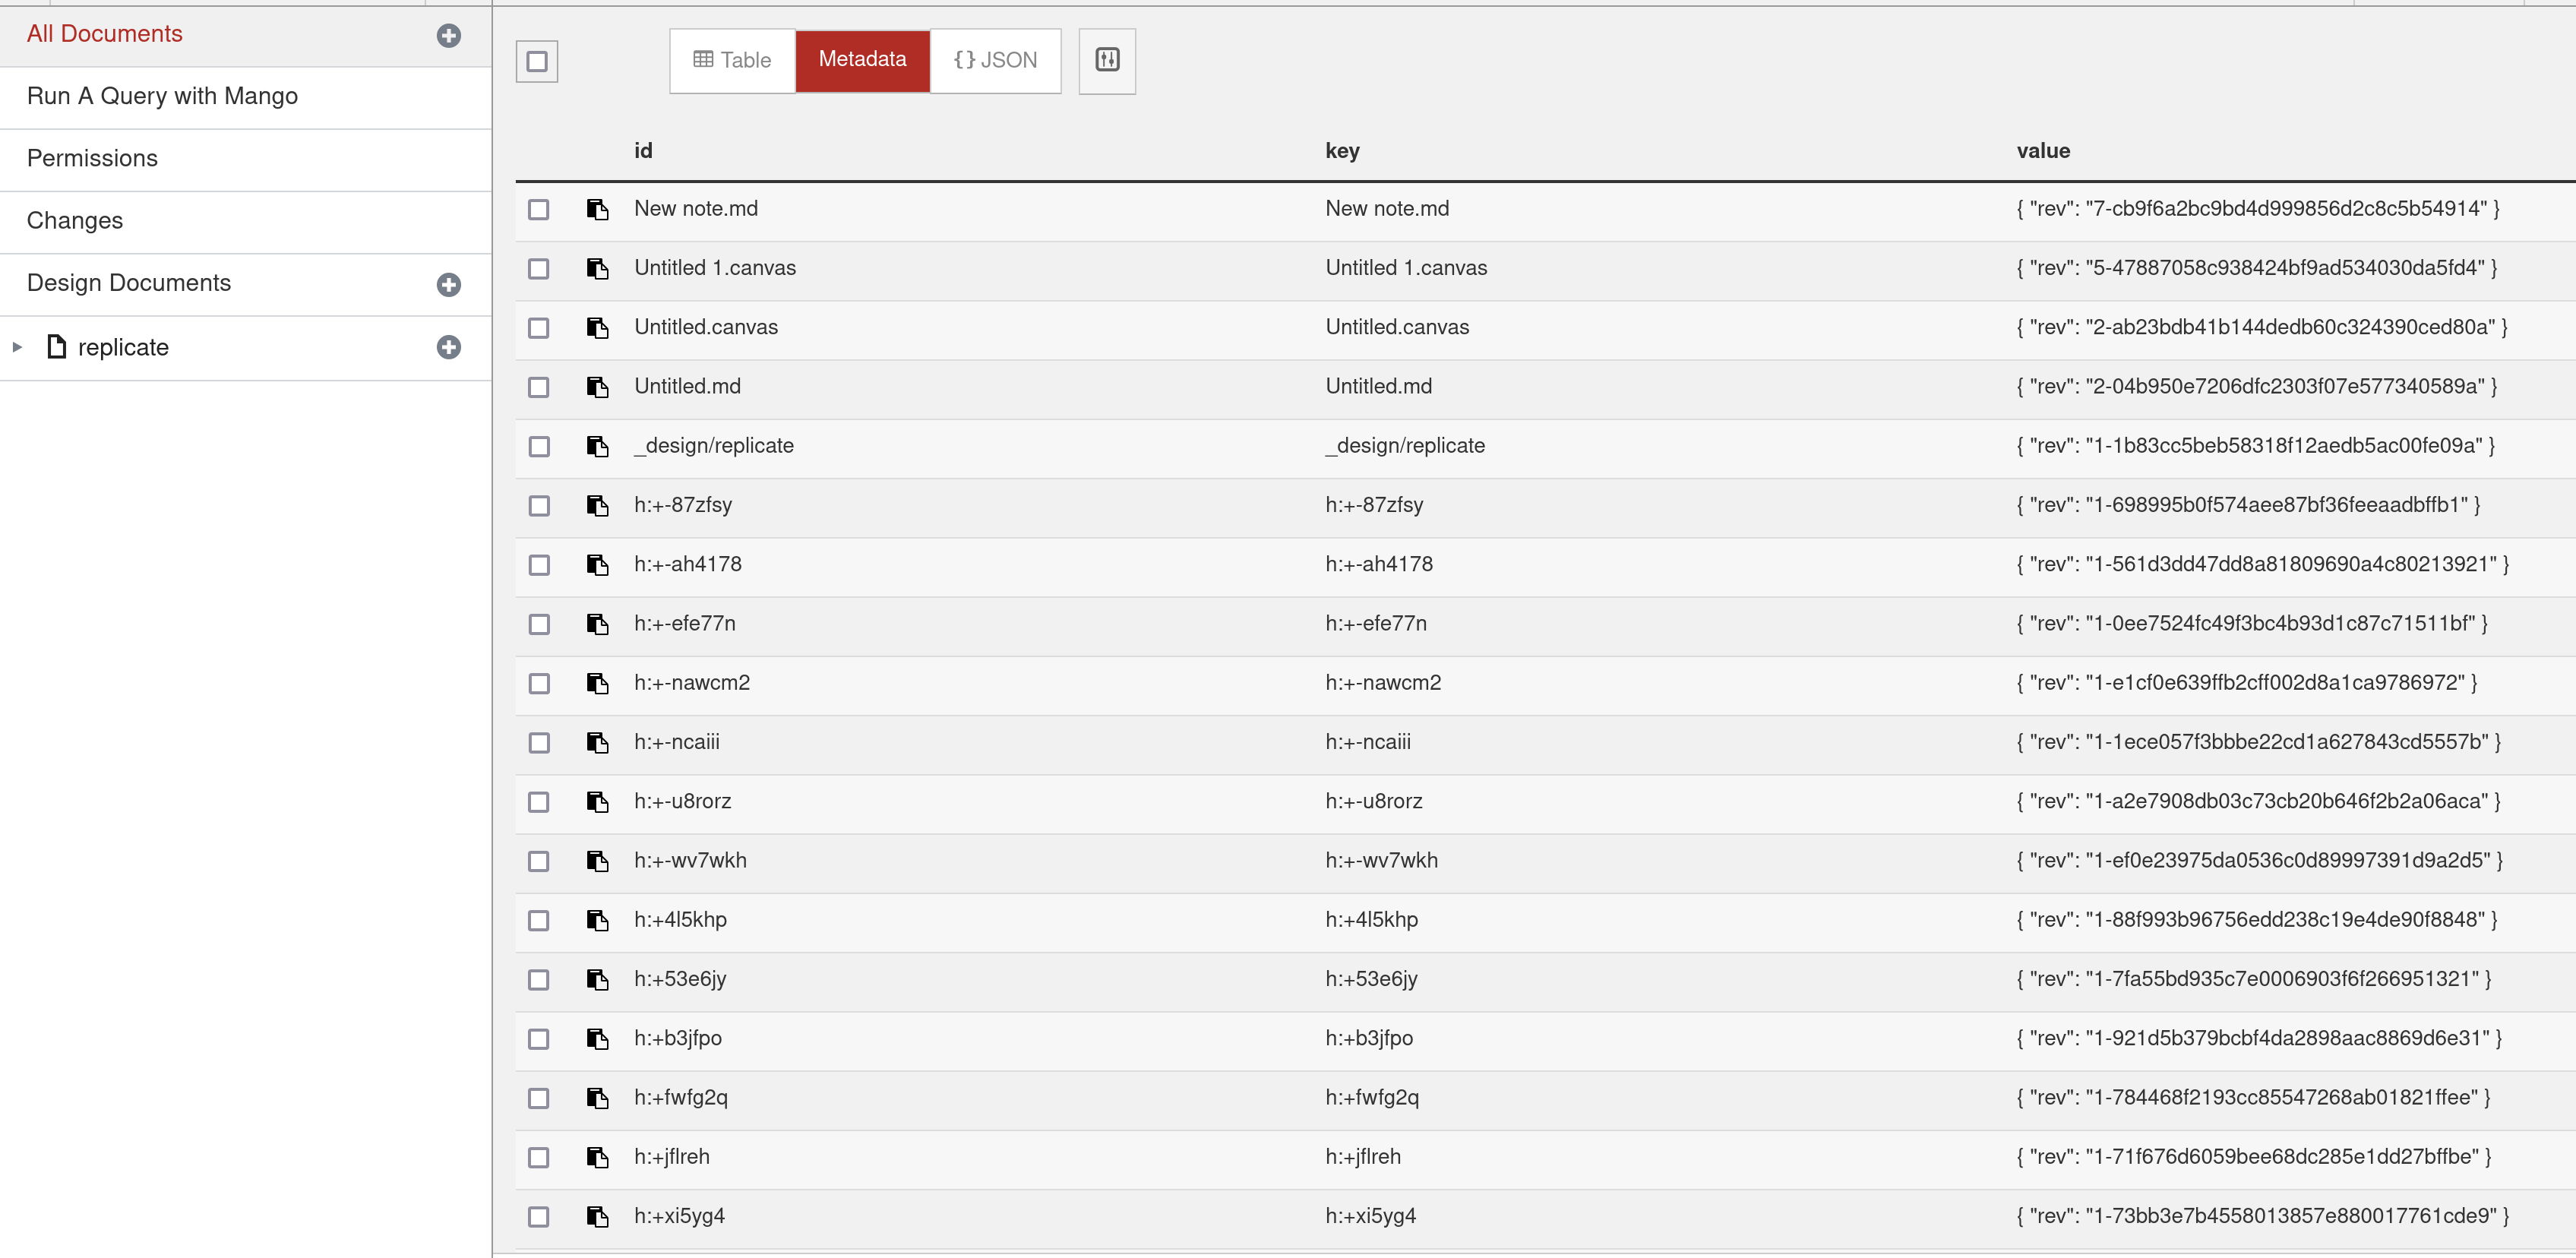
E2E is important because if someone managed to get into your DB instance, they would find all of your notes in cleartext. Enabling this encryption encrypts your notes before leaving your computer so that the DB instance never sees your notes, only scrambled garbage:
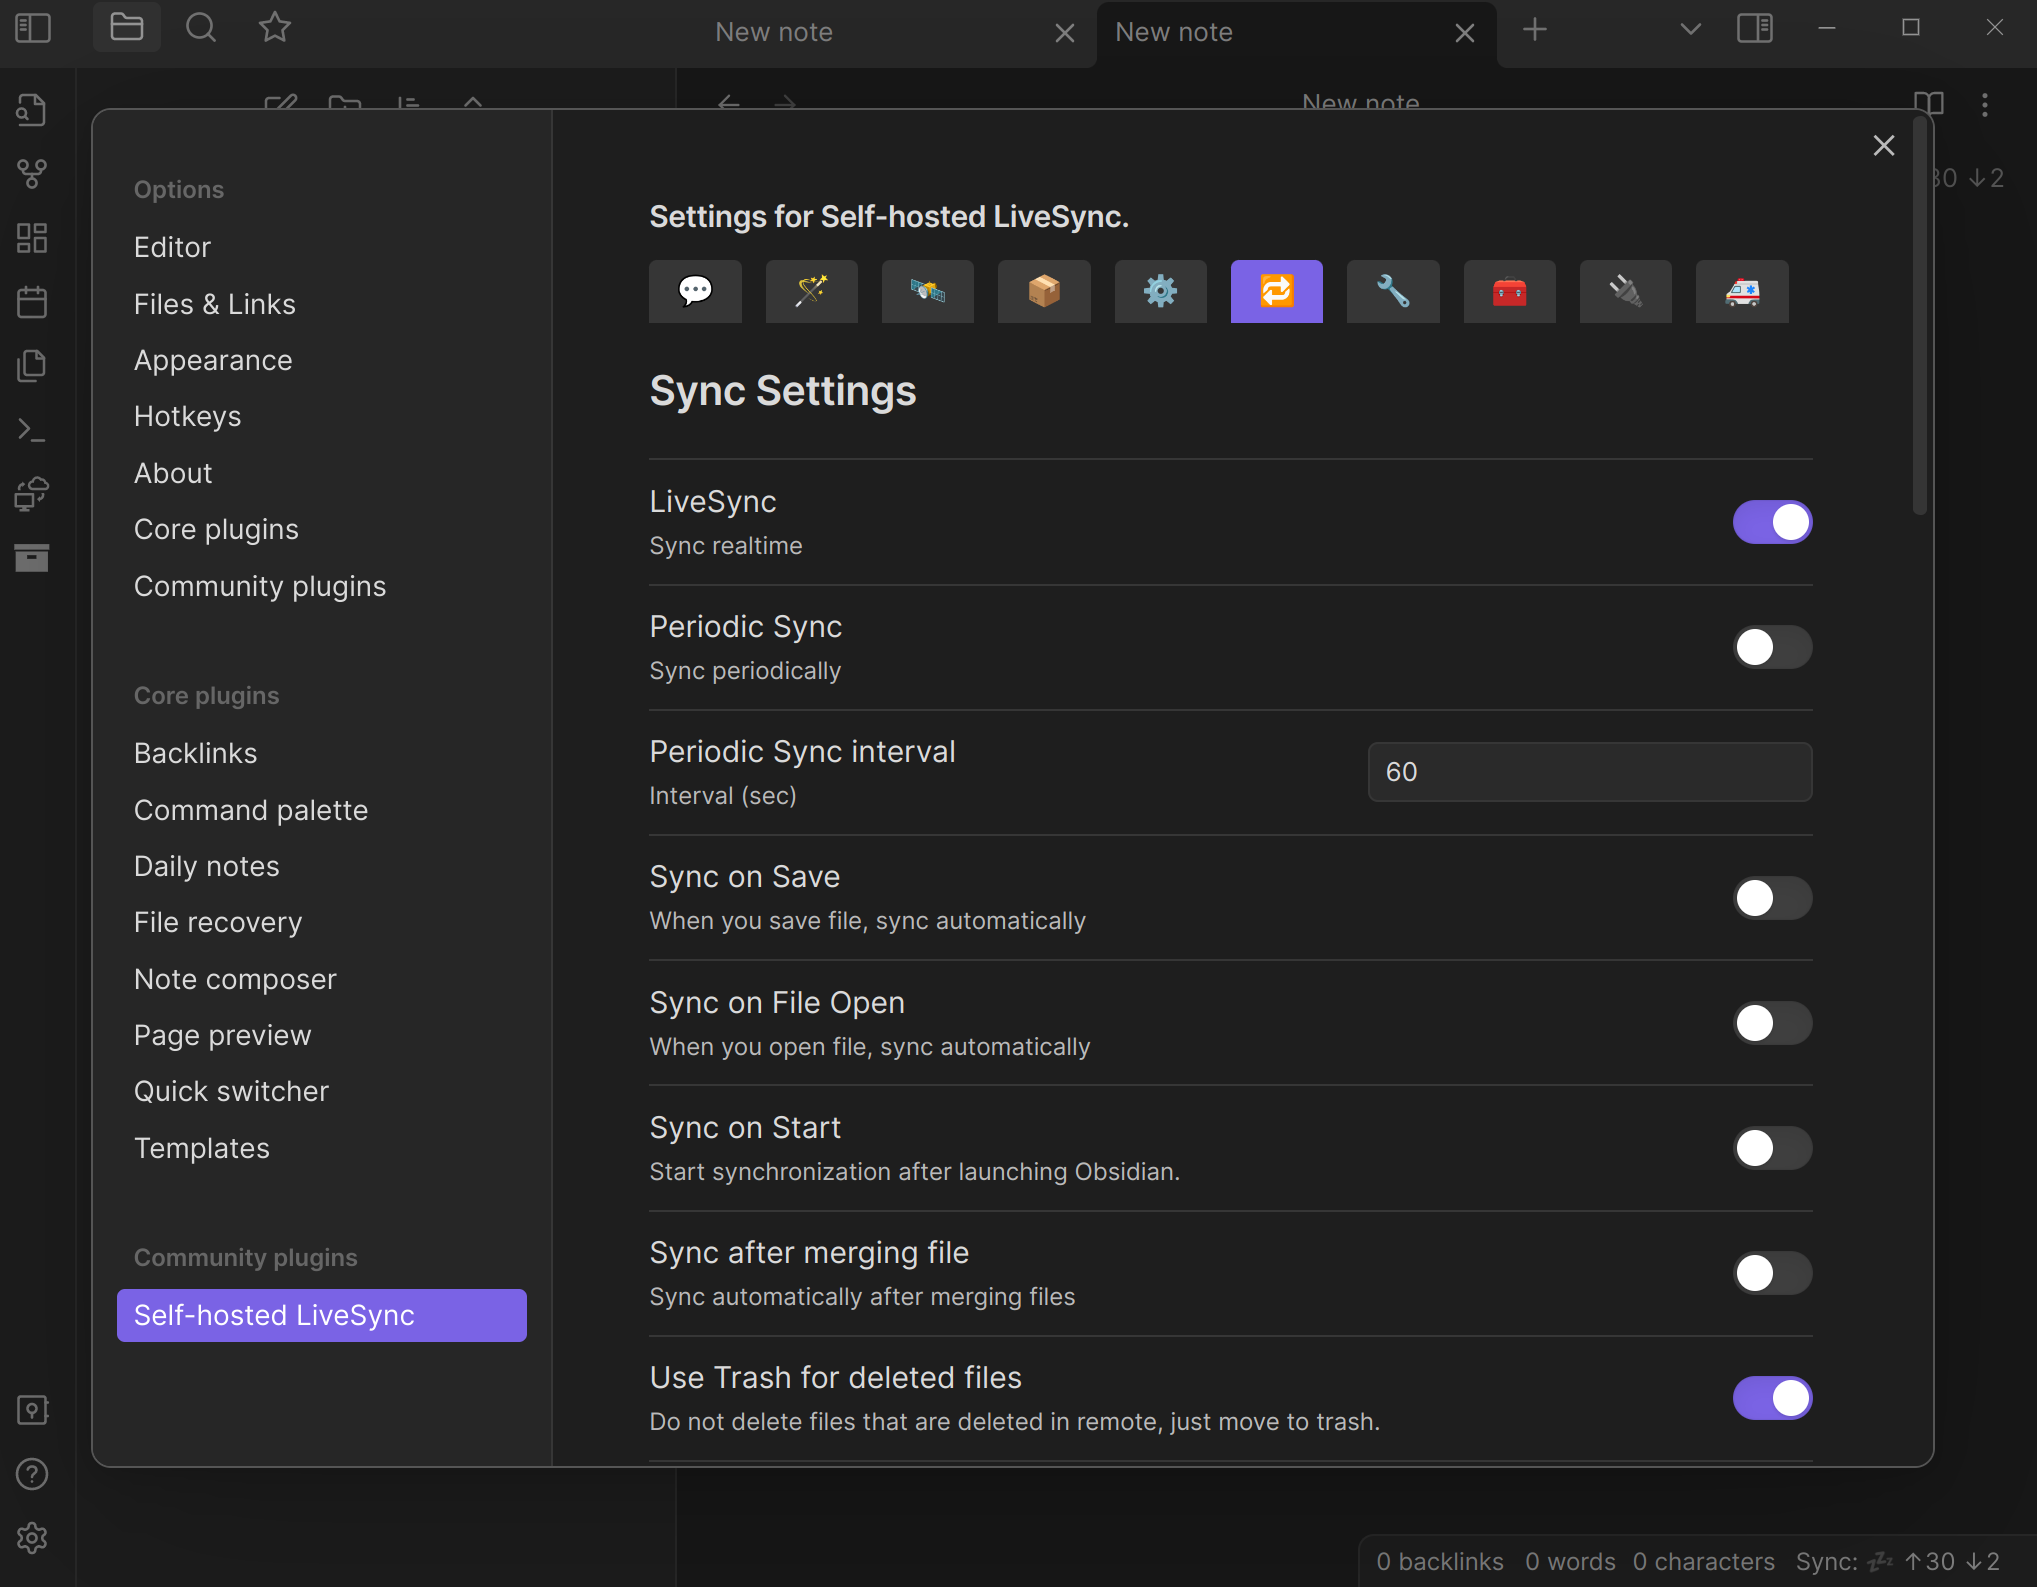
Next, press the swap emoji and select LiveSync (or whatever sync timing you prefer).
Using LiveSync will give you this functionality-- Not super useful, but very cool.
Conclusion
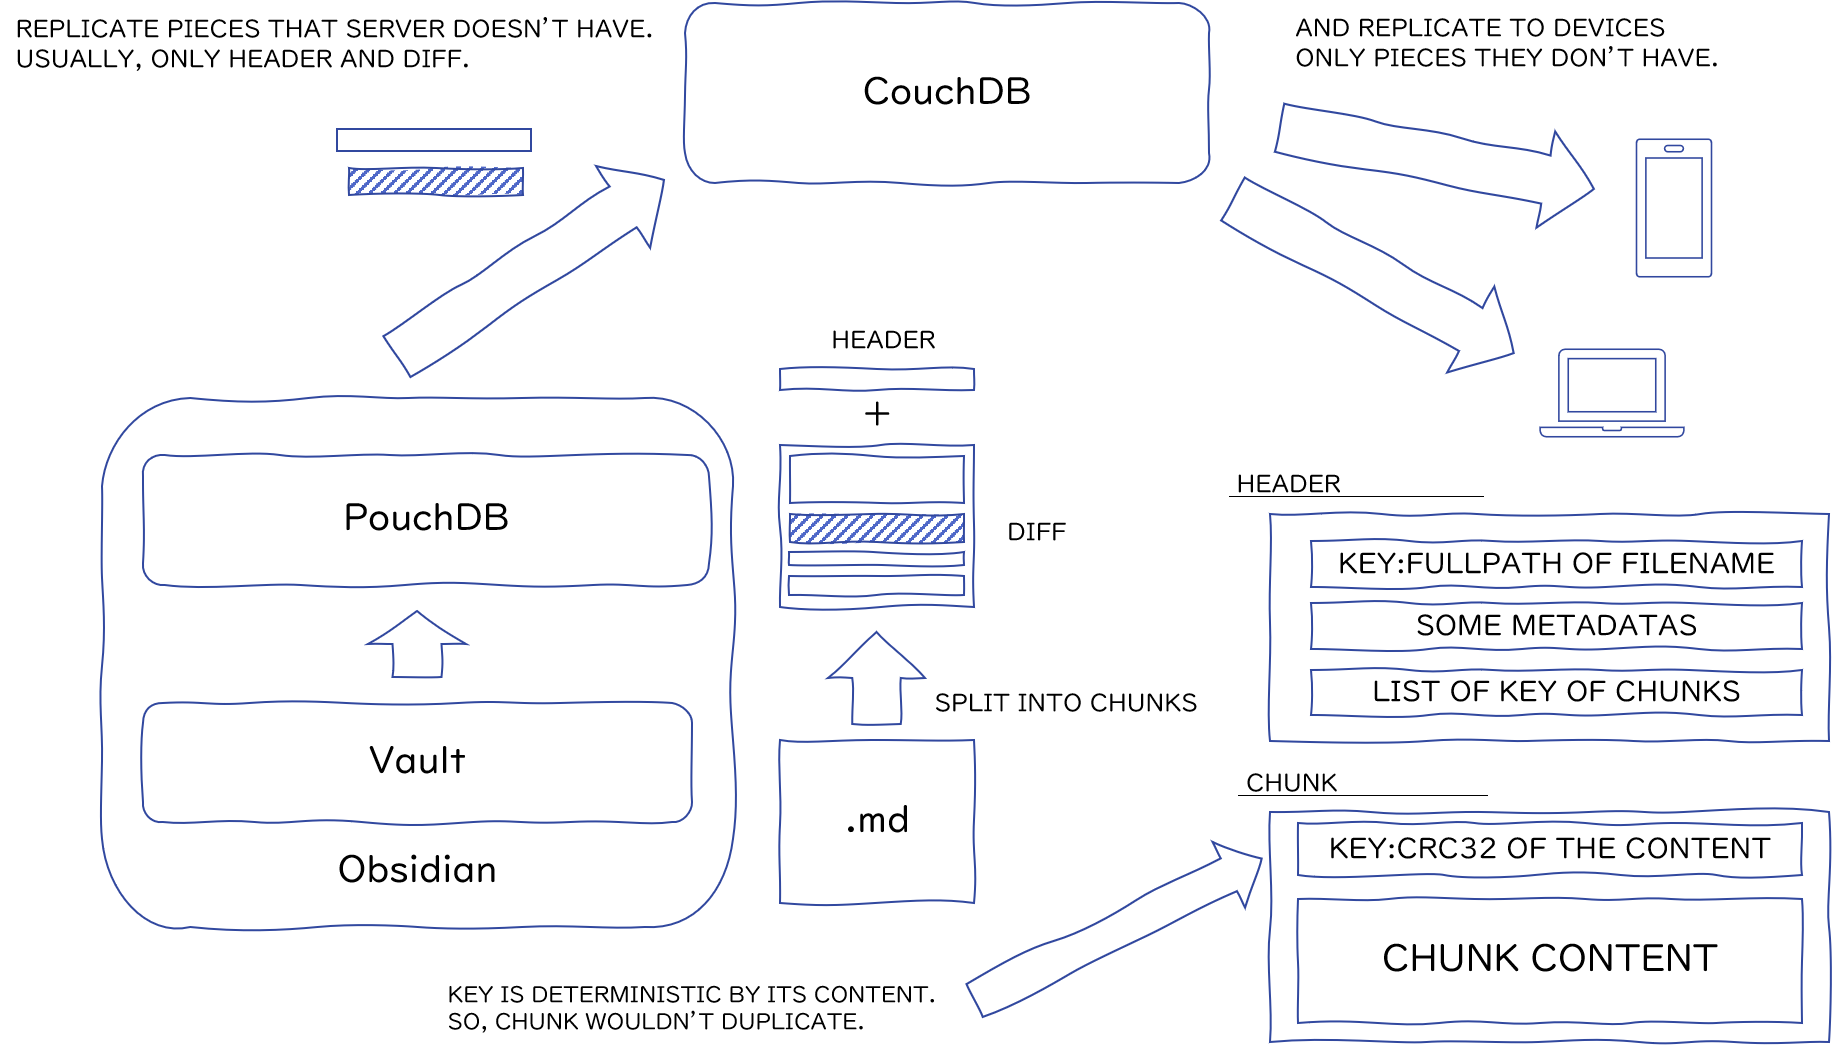
Now, on any device you wish to sync you simply repeat the last section. I've included an image of how the basic flow goes when syncing below if you are interested. Also, it is worth mentioning that AWS free tier is limited to 750 compute hours per month (I believe), so this might be a reason for you to periodic sync instead of LiveSync.